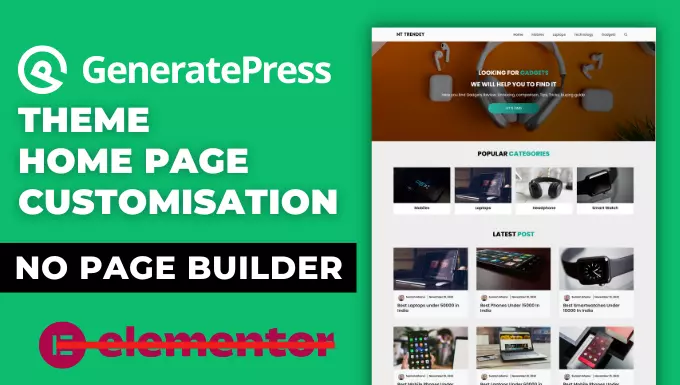
Do you want to create a WordPress Blog Website using GeneratePress Theme? I will teach you how to create a beautiful blog website using Generatepress theme in a very short time.
GeneratePress is a popular WordPress Theme. Using this theme you can easily create a mobile friendly lightweight website. But GeneratePress Theme has a Premium Version. You will get many advance customization options in this GeneratePress Premium Theme.
In these tutorials we will be using GeneratePress Premium Theme. You can also buy GeneratePress Premium Theme if you want.
In this video we have taught you how to create a beautiful blog website using Generatepress theme in a very short time. So first watch this full video.
CSS Code
/* GeneratePress Site CSS */
.inside-article,
.sidebar .widget,
.comments-area {
border-right: 2px solid rgba(0, 0, 0, 0.07);
border-bottom: 2px solid rgba(0, 0, 0, 0.07);
box-shadow: 0 0 10px rgba(232, 234, 237, 0.5);
}
/* Font CSS */
.page-header-image-single .attachment-full {
box-shadow: rgb(23 43 99 / 20%) 0 5px 25px;
border-radius: 10px;
}
@media (min-width: 769px) {
.post-image-aligned-left .post-image img {
margin-top: -20px;
border-radius: 10px;
box-shadow: rgba(23, 43, 99, .2) 0 5px 25px !important;
}
}
@media (max-width: 768px) {
.post-image-aligned-left .post-image img {
margin-top: -20px;
border-radius: 10px;
box-shadow: rgba(23, 43, 99, .2) 0 5px 25px !important;
}
}
.sidebar .widget {
box-shadow: rgb(23 43 99 / 10%) 0 5px 25px;
}
.separate-containers .page-header {
background: transparent;
padding-top: 20px;
padding-bottom: 20px;
}
.page-header h1 {
font-size: 1.5em;
}
.button,
.wp-block-button .wp-block-button__link {
padding: 15px 25px;
}
@media (max-width: 768px) {
.post-image img {
max-width: 100%;
}
}
/* Read More button */
a.read-more.button,
input[type="submit"] {
font-size: 14px;
padding: 10px 25px;
text-align: center;
transition: 0.5s;
background-size: 200% auto;
color: white;
box-shadow: rgba(23, 43, 99, .3) 0 7px 28px;
border-radius: 120px;
}
a.read-more.button:hover {
background-position: right center;
color: #fff;
text-decoration: none;
}
input[type="submit"]:hover {
background-position: right center;
text-decoration: none;
}
/*Comment Box*/
.comment-respond .comment-reply-title {
padding: 10px 10px 10px 25px;
background-color: #0D69F3;
border-radius: 40px;
font-weight: 500;
color: white !important;
font-size: 20px !important;
box-shadow: rgba(23, 43, 99, .3) 0 5px 25px;
}
/*webkit-sticky*/
@media (min-width: 769px) {
.site-content {
display: flex;
}
.inside-right-sidebar {
height: 100%;
}
.inside-right-sidebar aside:last-child {
position: -webkit-sticky;
position: sticky;
top: 20px;
}
}
body {
margin-bottom: 50px;
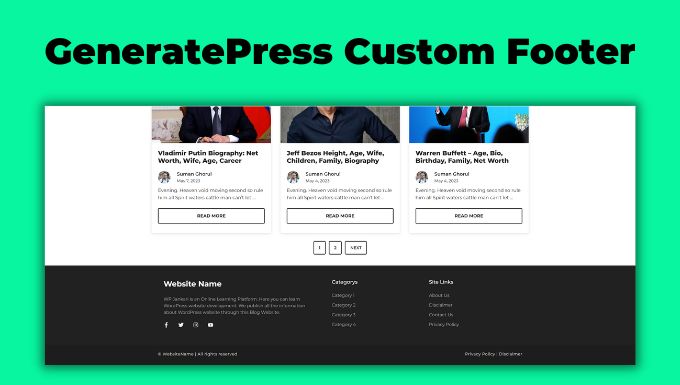
}Add Author Details
Do you need an author box on your blog website? In this tutorial, I will teach you how to add an author box to your WordPress website. To add an author box, watch this tutorial on wplogout.com
Author Details HTML Code
<div class="author-box">
    <div class="avatar">
        <?php echo get_avatar( get_the_author_meta( 'ID' ), 250 ); ?>
    </div>
    <div class="author-info">
        <h5 class="author-title" itemprop="author" itemscope itemtype="http://schema.org/Person">
            <span itemprop="name"><?php printf( get_the_author_meta( 'display_name') );?></span>
        </h5>
        <div class="author-summary">
            <p class="author-description"><?php echo wp_kses( get_the_author_meta( 'description' ), null ); ?></p></div>
<div class="author-links">
            <a href="<?php echo get_author_posts_url( get_the_author_meta( 'ID' ) ); ?>" title="Read more">...</a>
       </div>
    </div>
</div>
Author Details CSS Code
/*Author-Box*/
.author-box {
    padding: 3%;
    padding-bottom: 10px;
    margin-top: 30px;
    font-size: 0.9em;
    background-color: #fff;
    display: -webkit-box;
    display: -ms-flexbox;
    display: flex;
    -webkit-box-align: center;
    -ms-flex-align: center;
    align-items: center;
    box-shadow: rgba(0, 0, 0, 0.02) 0px 1px 3px 0px, rgba(27, 31, 35, 0.15) 0px 0px 0px 1px;
}

.author-box .avatar {
    width: 250px;
    height: auto;
    border-radius: 100%;
    margin-right: 30px;
}

h5.author-title {
    margin-bottom: 0.1em;
    font-weight: 600;
}

.author-description {
    line-height: 1.6em
}

.author-links a {
    margin-top: -1.5em;
    font-size: 2em;
    line-height: 2em;
    float: left;
}

@media (max-width: 768px) {
    .author-box {
        padding: 20px;
        padding-bottom: 25px;
        margin-top: 60px;
        flex-direction: column;
        text-align: center;
    }

    .author-box .avatar {
        margin-right: 0;
        width: 100%;
        margin-top: -25px;
    }

    .author-box .avatar img {
        max-width: 100px;
    }

    .author-links a {
        float: none;
        align-self: center;
    }

    .author-description {
        margin-bottom: -0.1em;
    }
}
Thanks


nice website